I used them for about 10 sessions now and I am very happy with them so far, but will post updates if needed.
 |
| How I use my shuttle |
Library Mode
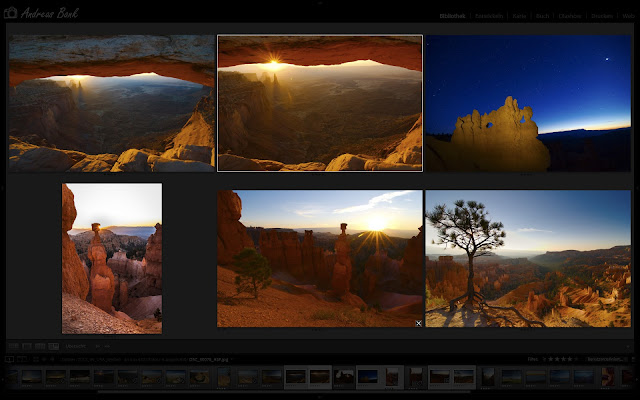
For library mode I've set up the shuttle to support me during the "cull&rate" workflow stage. Therefore the top buttons are assigned to the pick & reject flags and 1-3 stars (I rarely give an image more than 3, if so I can spend the time to assign them with the keyboard or the mouse).During "cull&rate" I spend the most time working with the overview mode of LR4 (keyboard shortcut N), with side panels closed (Tab key) and in lights mode (L key), so that my desktop looks like this:
This allows me to do comparison based image selection. To go through the images I have assigned a macro to the 1st stage left turn of the shuttle ring which will show me the selected image plus 3 more. The 1st stage right turn will add an additional image to the selection.
With the jock wheel of the shuttle or the mouse or in my case the wacom tablet lying next to the shuttle I work on my selection:
- shift click to remove it
- select + "pick"- / "reject"-button on the shuttle to select them for the next workflow stage
- turn the shuttle ring left to get the next images
- turn the shuttle ring right to add another image
I also included an option to quickly add keywords.
To do so I go the the grid mode (Grid button the shuttle) and open the keyword panel on the right (Tab button on the shuttle) and the keyword sub panel (keywords button on the shuttle). Now I can use the joq wheel to go from image to image while I hover the mouse over the keyword panel (see next image). To add keywords I just click them in th keyword panel while I use the "next set"-button on the shuttle to toggle through my 5 sets.
Development Mode
In the development stage I configured the shuttle to give me quick access to the things I use the most:- basic settings panel
- crop tool
- gradient tool
- selective correction brush
- white balance
Additionaly I configurerred a button to show the before and after comparison, toggle throug the light modes and quck zoom.
The remaining buttons I used to quickly adapt the tools at hand:
- O-key: allows me to change the overly grid in crop mode and toggles on and off the brush mask (allthough I also have that available on my wacom tablet pen)
- A-key: switch the auto mask on/off
Finally I configured the shuttle ring to replace my mouse wheel so that I can quickly resize the brush and the feather sizes.
Is everything perfect?
No, not yet and will probably never be :-). But one feature I really miss is the ability to switch settings in makros. Because each time I switch between the library and development module in lightroom I need tot switch the settings of the shuttle manually via the system trey icon. It would be great to create a makro that would chain the command that tells lightroom to go the desired module (G or D key) and the command that would select the appropriate settings for the shuttle.
More to come!
Cheers,
Andi


Danke für deinen Beitrag Andi! Ich werde ihn mit meinen Einstellunge vergleichen. Ich habe im Develop Modul noch den Reject Flag auf einem Button, da ich manchmal auch in dem Modul etwas ablehne. Auch den Sync... habe ich im Develop Modul noch mit drin. Mir gefällt deine Anordnung. Werde mir ein paar Ideen von dir übernehmen!
AntwortenLöschen"No, not yet and will probably never be :-). But one feature I really miss is the ability to switch settings in makros. Because each time I switch between the library and development module in lightroom I need tot switch the settings of the shuttle manually via the system trey icon."
AntwortenLöschenAndi No you don't I have used a cross between your settings and Jared Platt's settings and you can get the shuttle pro to cycle between your library and development modules. Using the Previous and Next switch modifier you can handily move between the two. Set a button on your Library Module to "Next" (if your develop module is under the library module) and it will switch. In the develop settings set the same button to "Previous" and you can toggle back and forth between the two. Bam now you're perfect! No manual adjustments.